Shortlink of this page: http://wp.me/PrgSo-3D (use this in your BBS/forum/Facebook/Twitter messages). Download the PDF version of this page here.
Changelog: 6 January 2011 – Added a note for the new ffmpeg-based deband filter in ffdshow.
WARNING: THIS POST CONTAINS MANY LOSSLESS PNG IMAGES. IT MAY TAKE SOME TIME FOR THEM TO LOAD.
ffdshow is a decoder-cum-post-processing package that is common in codec packs such as CCCP and K-Lite Codec Pack. It not only can decode various video and audio formats, but also do some post-processing on them. Post-processing allows you to improve picture quality, repairing bad ones and some other features like logo scrubbing etc.
In this article I will focus upon how to use ffdshow post-processing feature to try and improve the picture quality (PQ) in anime (or cartoons and the likes), based upon my own experience of playing with it while watching hours upon hours of anime. I should warn you though that you will not be able to use DXVA for h.264 videos if you chooses to do this, thus a reasonably fast CPU will be needed here (or use CoreAVC CUDA). A decent quad-core or a fast dual like Intel E8400 is what I will recommend. Plus, post-processing shouldn’t be done on high-definition material from Blu-ray/HD-DVD sources, but you may have to do it from OTA sources.
There is a thread at avsforum which configure ffdshow with avisynth scripts like seesaw and limitedsharpenfaster for use. From my tests, the seesaw works better with sharper PQ without too many noise/ringing/halo being introduced to it.
Original:-

Open picture in new window/tab by clicking here.
Limitedsharpenfaster:-
Open picture in new window/tab by clicking here.
Seesaw:-

Open picture in new window/tab by clicking here.
ffdshow post-processing
If you have a really fast CPU, like an overclocked Q6600 or E8400, you can try using those settings at that thread to get a noticeable PQ improvement. But then again, those scripts are geared more towards non-animation DVD sources. Below is what you can use without the need of Avisynth scripts to improve the PQ of your anime videos.
First filter – Deband.

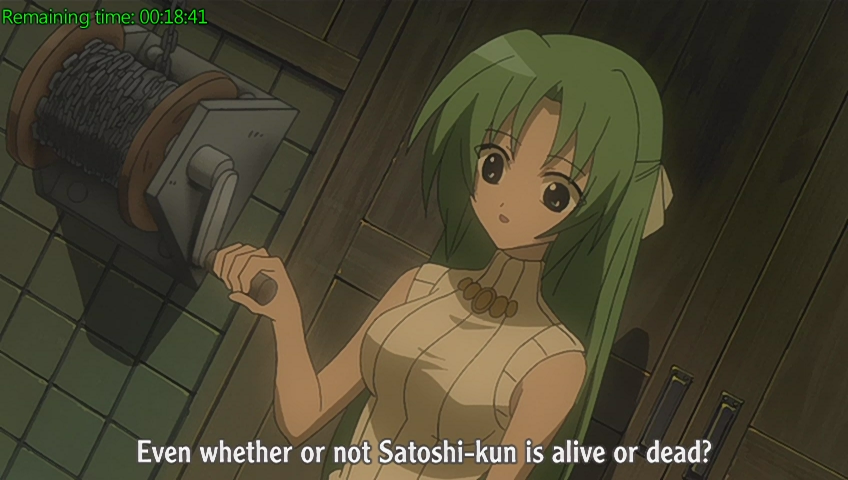
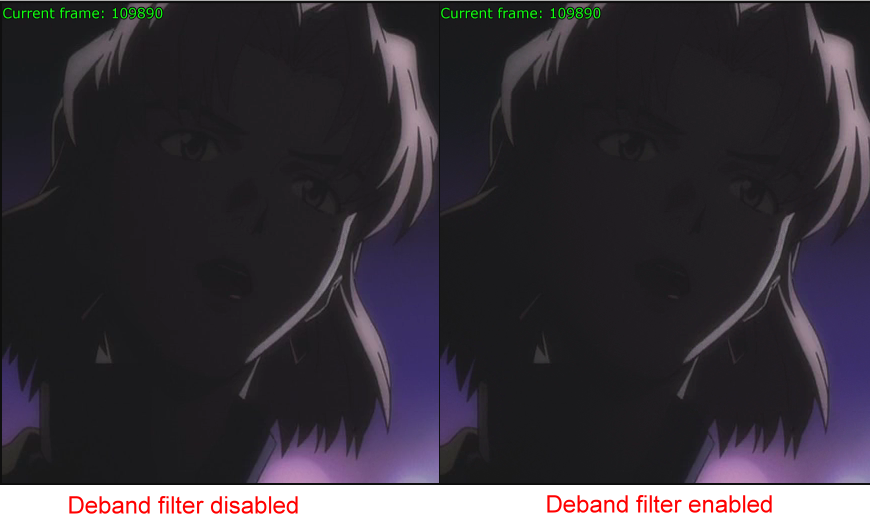
Deband is simply the most important ffdshow filter you will want to turn on when it comes to anime. This will reduce colour banding as shown below.
If deband is off:-

Open picture in new window/tab by clicking here.
Deband turned on (threshold: 1.2):-

Open picture in new window/tab by clicking here.
Open picture in new window/tab by clicking here.
The colour gradient is smoother when deband is turned on. Banding are more common on animation like Japanese anime than real-life videos, especially in (HD)TV rips that are used by most of the fansub groups out there. Banding is even more noticeable when you are using LCD monitors. Not that DVD is not affected, just ask Dr. Akagi. The default value is 1.2 and 16 for threshold and radius respectively, though feel free to increase/decrease it to match your preferences. The Wolf and Spice example could have done with extra couple of notches, but 1.2 usually do the job.
As of build 3719, the older deband filter based on the gradfun2b avisynth plugin has been replaced by a new ffmpeg-based deband filter (now multithreaded and have proper SIMD support). Now, you can use this filter even in FullHD videos as long as you have a decent dual-core CPU. There should be no reason whatsoever for you not to use this filter to fight some atrocious banding introduced by some certain anime fansub groups out there!
Second filter – Sharpen
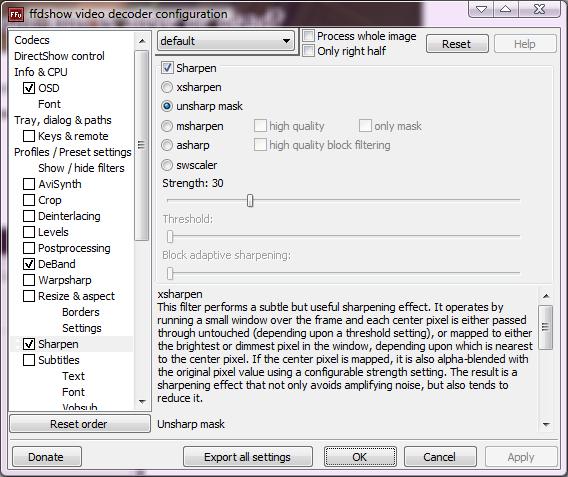
Unlike the deband filter that removed imperfections, sharpen filter enhance the PQ of a video.
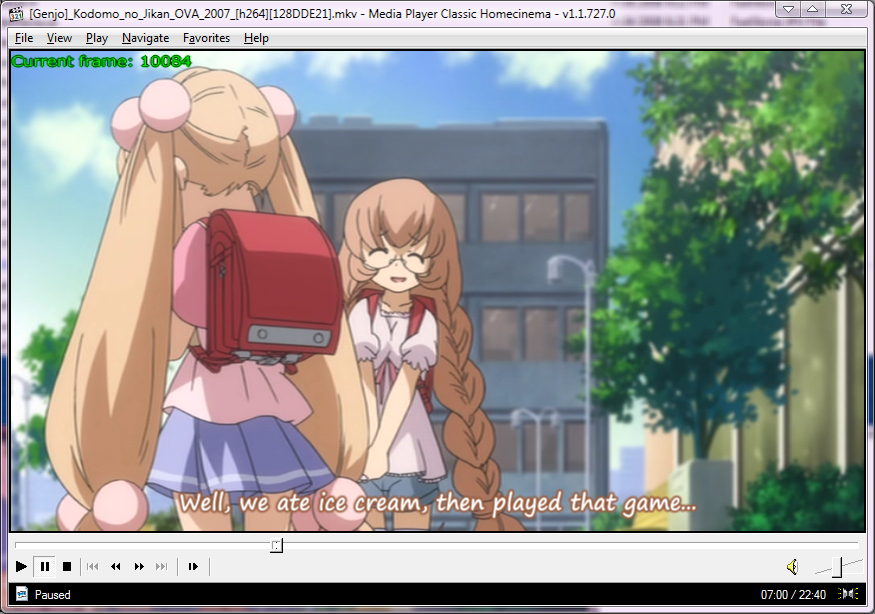
No sharpening:-
Open picture in new window/tab by clicking here.
Sharpening turned on, setting: unsharp mask (strength:60)

Open picture in new window/tab by clicking here.
Sharpening turned on, setting: msharpen high quality (Strength:70, Threshold: 15)
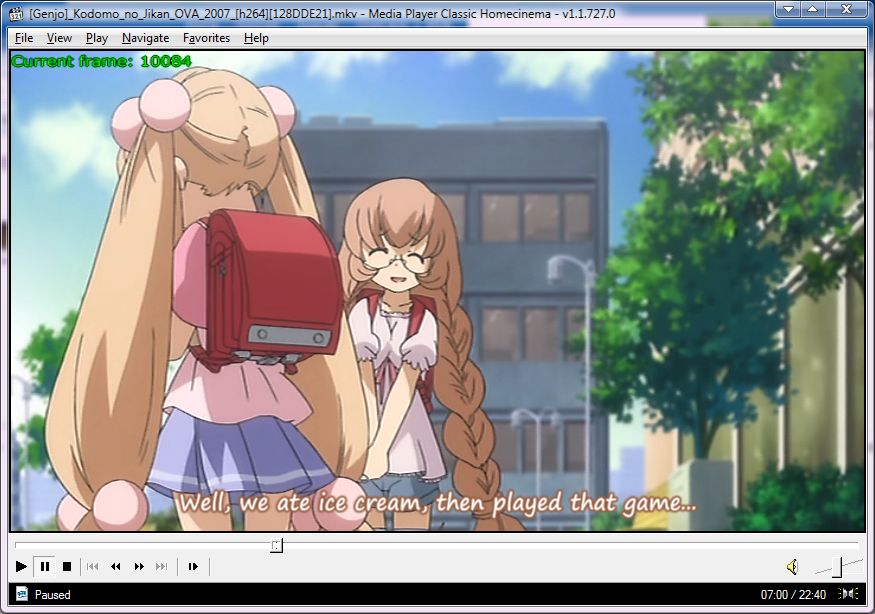
Open picture in new window/tab by clicking here.
As you can see above, the sharpen filter enhance the lines and edges of things. From the ffdshow setting, there are 5 sharpening methods available, but IMHO the good ones are only the first three (xsharpen, unsharp mask and msharp). Personally I use unsharp mask with 20-60 strength, mainly because it gives the best quality/performance ratio. For really bad encodes (like this), a full blown msharp HQ with high strength value is needed. Sharpening filters must be used judiciously, because too strong the filter being used, it will look bad with halos and/or ringing effects. The unsharp mask sample above with strength of 60 is a prime example of oversharpening, you can see slight halos on the left side of Kokonoe Rin’s humongous hair.
Below is sharpening with ATI AVIVO AVP2 edge-enhancement with strength at 40.
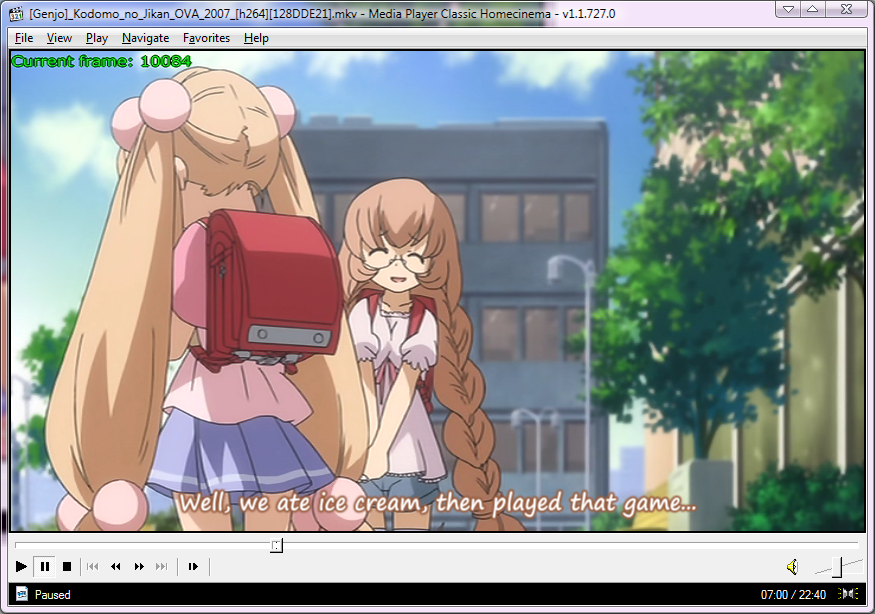
Open picture in new window/tab by clicking here.
Above is the same frame being sharpened with ATI AVIVO AVP 2.0 edge-enhancement algorithm (strength = 40), combined with denoiser effect (strength = 10). It also looks sharper, but with much less halo and noise. Hardware-based sharpeners is not only faster and takes less CPU resources, it also is of higher quality than ffdshow-based software sharpeners. I will make another post regarding hardware-based post-processing in the future, so check out this blog often.
The following filters are optional.
Third filter – Blur & NR.

This filter will try to remove noise from the video. This filter is optional, mainly because animation is less prone to noise/grain compared to real-life videos. The source must be really bad for noise to appear, maybe a VHS rip.
Fourth filter – Post Processing

This filter should only be used if you also use ffdshow as your decoder instead of external decoder like DiVX, CoreAVC or XviD. Do not use this if you do not use ffdshow as a decoder.
Example:-
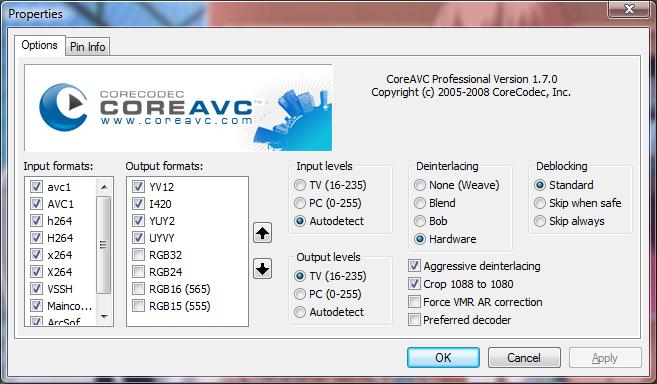
Fifth filter – Deinterlacer
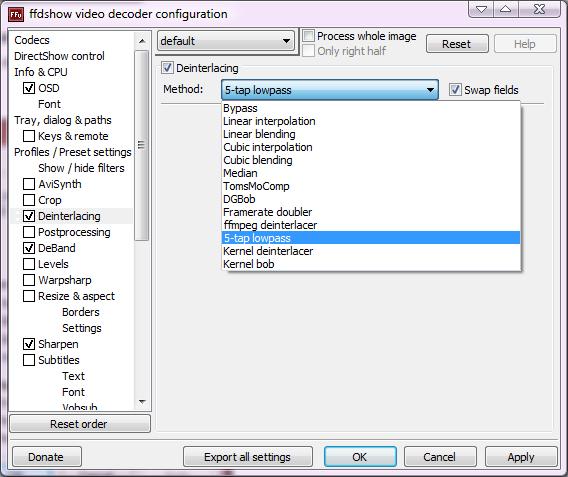
Use this if your source is interlaced, like that EVA Directors Cut DVD box set I have. Almost all TV-rip-based (and so are Blu-ray and HD-DVD rips) releases are progressive, so no need to turn this on. If you see combing (from DVD rippers who does not know how to encode), this filter will help mitigate it too. Good deinterlacers are TomsMoComp, 5-tap lowpass, kernel deinterlacer and kernel bob.
That’s about it with ffdshow filters. The order they are stacked upon in ffdshow are important too, so assuming that you enable it all, the order from top to bottom should be:-
- Deinterlacer.
- Post-processing.
- Deband.
- Sharpen.
- Blur & NR.
Question: How about the resizing filter?
– Personally I think it is better for the graphic card itself to do the resizing using the card’s pixel shaders than using ffdshow to do CPU-based software resizing. The difference in quality is negligible between hardware-based bicubic resizing with pixel shaders (doable with Haali Video Renderer, VMR7/9 renderless and EVR custom presenter) and software-based Lanczos 2-tap/spline ffdshow resizing.
Subtitles
Majority of the anime fansub videos nowadays are released in .mkv or .mp4, usually with embedded subtitles (srt or ass or even ttext). For users of codec packs like CCCP or KLite Mega Codec Pack and did not use software like VLC or KMPLayer, there are 3 methods that can be used to display subtitles:-
– vsfilter a.k.a. DirectVobSub.
– ffdshow subtitle filter.
– MPC(HC) internal subtitle engine.
For those who only has 15-19” monitors, the problem will not be apparent, but users of higher resolution monitors will notice that their subtitles will look jagged when watched full screen. Example of a low-quality subtitle (from Hauu’s Higurashi no Naku Koro ni Kai SD) displayed fullscreen on 1680×1050 resolution:-

Subtitle engine:- DirectVobSub with MPC-HC.
You may think “What’s wrong with that subtitle?”. If you ask that question, take a look below.

Subtitle engine:- KMPlayer internal subtitle engine.
You got to be blind not to see that the 2nd subtitle looks WAY BETTER than the first one. The environment is the same, and the video has not been resized (which is the requirement of DirectVobSub if you want to get better looking subtitles). This is because KMPlayer has one of the best (if not the best already) subtitle engine out there (actually this is already obselete with Beliyall’s MPC-HC build). But then again, KMPlayer is not exactly svelte like ZoomPlayer or MPC-HC, and it takes long to load and the time it takes to open a file can take up to 5 seconds. Those who like a fast and lean player like MPC-HC will not like the speed of KMPlayer.
But then take a look again at the screenshot below:-

The subtitle above are also done with DirectVobSub and MPC-HC, but the difference is that DirectVobSub has ben instructed to double the resolution of the video being sent to the video renderer. This enhance the subtitle quality immensely but at the price of heavy CPU usage. Plus, this will make DirectVobSub almost unusable for high-definition videos (imagine a 1080p video being upscaled 100% ).

Above picture are subtitles taken with ffdshow subtitle filter with MPC-HC, without video resizing. Not exactly beautiful and sharp am I right?

It looks so much better when the ffdshow resize filter is activated (to resize to desktop resolution – resize filter must be above subtitle filter). In fact, probably look better than even KMPlayer. For those who thinks to use ffdshow subtitle filter, forget it. It isn’t feature complete, and unable to render complex subtitles properly. The speed and quality is decent though, which is a pity.
Thus, the only recourse you have for a high-resolution subtitle is the MPC-HC internal subtitle engine. Now take a look at how it looks at default setting (800×600 round up to the power of 2):-

To me, it looks like a slightly inferior version of the KMPlayer subtitle engine, and definitely better than original DirectVobSub. Now how about if the setting is changed to use Desktop resolution?

Well, it does look sharper than the previous one, about as good as KMPlayer, a little bit superior to DirectVobSub double resolution but nowhere as good as ffdshow desktop resolution.
I can already see you thinking about using ffdshow subtitle engine, but no you shouldn’t, yet. See below.

MPC-HC at desktop resolution.

DirectVobSub double resolution.

ffdshow desktop resolution.
ffdshow subtitle filter chokes at every opportunity when complex subtitles are involved. And do not get me started upon positional subtitles (the ones you see on signboards etc.) because more often than not ffdshow will screw up that one too.
In other words, the best subtitle engine you can have for now, if you do not want to use KMPlayer, is the MPC internal subtitle engine. It is reasonably fast, feature-complete, DXVA-compatible and looks better too than normal DirectVobSub. Just set it up like below and you should be set.
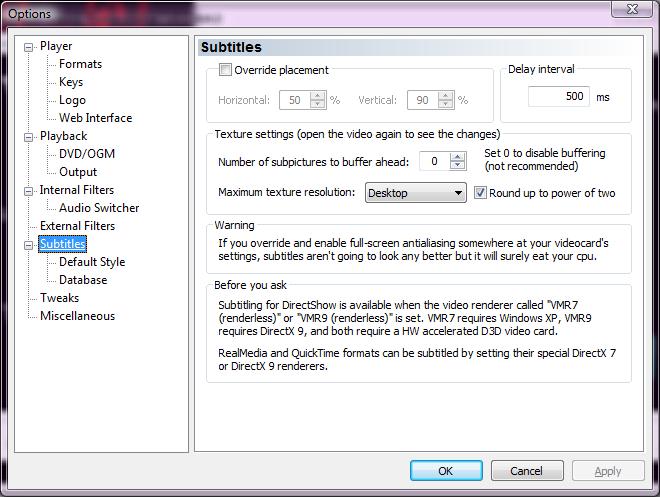
Another method that you can use is to resize the video to desktop resolution using ffdshow and then let DirectVobSub render the subtitles over it. It should achieve the same effect as the method above, with the penalties of higher CPU utilizations and loss of DXVA functionality.


Hey, I’m getting some skipped frames using your most recent guide:
1080 GTX
2500K @ 4.5GHZ
8GB 1866MHZ RAM
1TB 850 Samsung EVO SSD
W7 64-bit
8-bit-IPS, 2560x1440p monitor.
Watching a 1080p anime download, a rather tame one – not alot going on, I am getting more skipped frames than any before. Another show I watched had some as well – but only like…5 the entire time. This one has like 50 by the end of it, and it’s easy to notice. Only when full screen or when I jump ahead.
What filter(s) did you use?
It is configured exactly as your guide shows, I figured my GPU was strong enough for it. I see 90% maximum GPU usage during a 1080p video. NNEID3 and whatnot.
None of the ffdshow filters here runs on the GPU, maybe it is caused by higher CPU utilization?
MadVR configuration, but no comment page there.
It does seem to max out one core @ 25% though.
I have no idea then, maybe you can try installing the latest version of the installer above, then choose the high-end preset instead of using the configuration at the madVR page, plus also use software decoding and see if the problem still happens?
Also make sure that your GPU core and memory clocks has risen to the maximum when measuring GPU usage.
They have. I was using Software decoding mode. I switched to the NVIDIA CUID one and I see less frame drops, like 19 instead of 50. So it’s related. I notice my videos frame-rate sometimes goes below my refresh rate of 110HZ, is that related?
I think video frame rate is always below refresh rate.
The site for the Avisynth Seesaw script is not found pls confirm.
Oh, even I cannot find the original link anymore, sorry about that.
It seems madVR+xySubFilter is right now the king of the high resolution subtitle renderers.
I’m from England buy cheap loratadine online
74033 pron
777557
Do ffdshow post-processing can be used with 64bit version? because when I enable aWarpSharp in ffdshow raw video filter nothing happens.